The Results
Let's start with the good stuff: here's what a VW bus dash can look like with a good LED conversion (note: this is a scrap dash cluster on the bench for prototyping purposes - hence the broken speedo needle):

Introduction
I have never been happy with the dash instrument lighting in my '71 VW panel van. Even with the dimmer rheostat turned all the way up, the gauges have just barely been visable at night. And my eyes haven't gotten any better with age. So, it became time to do something about it.
There are several options for dealing with this.
- Change out the two instrument illumination bulbs to higher wattage, brighter bulbs.
- Change the lamps to LED plug-in bulbs.
- Come up with a whole new lighting scheme.
The first option (bulb wattage upgrade) is obviously the easiest option. The downside of this option is that it would increase the load on the dimmer rheostat, making it run hotter (especially considering I've added a tachometer to the dash, which has two bulbs of its own). Unfortunately, my specific headlight switch is NLA, and the available replacement switches no longer have the connection (#57) for the green "headlights aren't on, you dummy" indicator lamp, so I really don't want to cook it.
The second option is a viable possibility. Its only downside is, while it would make the gauges brighter, it wouldn't improve the evenness of the lighting. Because there are only two bulbs, these instrument clusters tend to have a slightly darker fuel gauge, compared to the speedometer.
The third option cures the evenness issue, and surely solves the brightness issue. Besides, I found the perfect LED lighting strip to make this happen at my Friendly Local Auto Parts Store, right off the shelf.
The Fix
The solution uses a flexible clear silicone rubber encased LED lighting strip made by Pilot Automotive, part number CZ-3143W. It has 18 LEDs in the approximately one foot long strip. They come two strips to a package, and include a small battery pack and power button. For this project, you only need one of the strips, so you can use the second for an auxiliary interior light, or something. They operate on 12 volts.
There is a fly in the ointment, however. LEDs, by nature, will not dim properly using the stock headlight switch rheostat. They will be basically either on or off. This, of course, isn't viable, but there are solutions:
- Use an off-the-shelf aftermarket dimmer, made to dim LEDs.
- Make your own dimmer.
Because I could, and because I wanted to use the original headlight switch rheostat as the control, I chose the second option. More on this later.
Dimming LEDs
LEDs, being diodes, are current-driven devices. They operate at a fixed voltage, mostly independent of the current passing through them. The current is normally limited by placing a resistance in series with the LED, and this resistance is normally included in the LED module. For efficiency reasons, there is usually not that much voltage dropped across this resistance, so varying the voltage applied to the LED assembly results in a somewhat radical on/off characteristic.
There is a method which will result in perfectly even dimming, known as Pulse Width Modulation. With PWM, the LEDs are pulsed on and off for variable time periods, where the ratio of 'on' time to 'off' time determines the brightness. This pulsing is too fast for the eye to see. When 'on', the LEDs are being operated at full voltage.
The Build
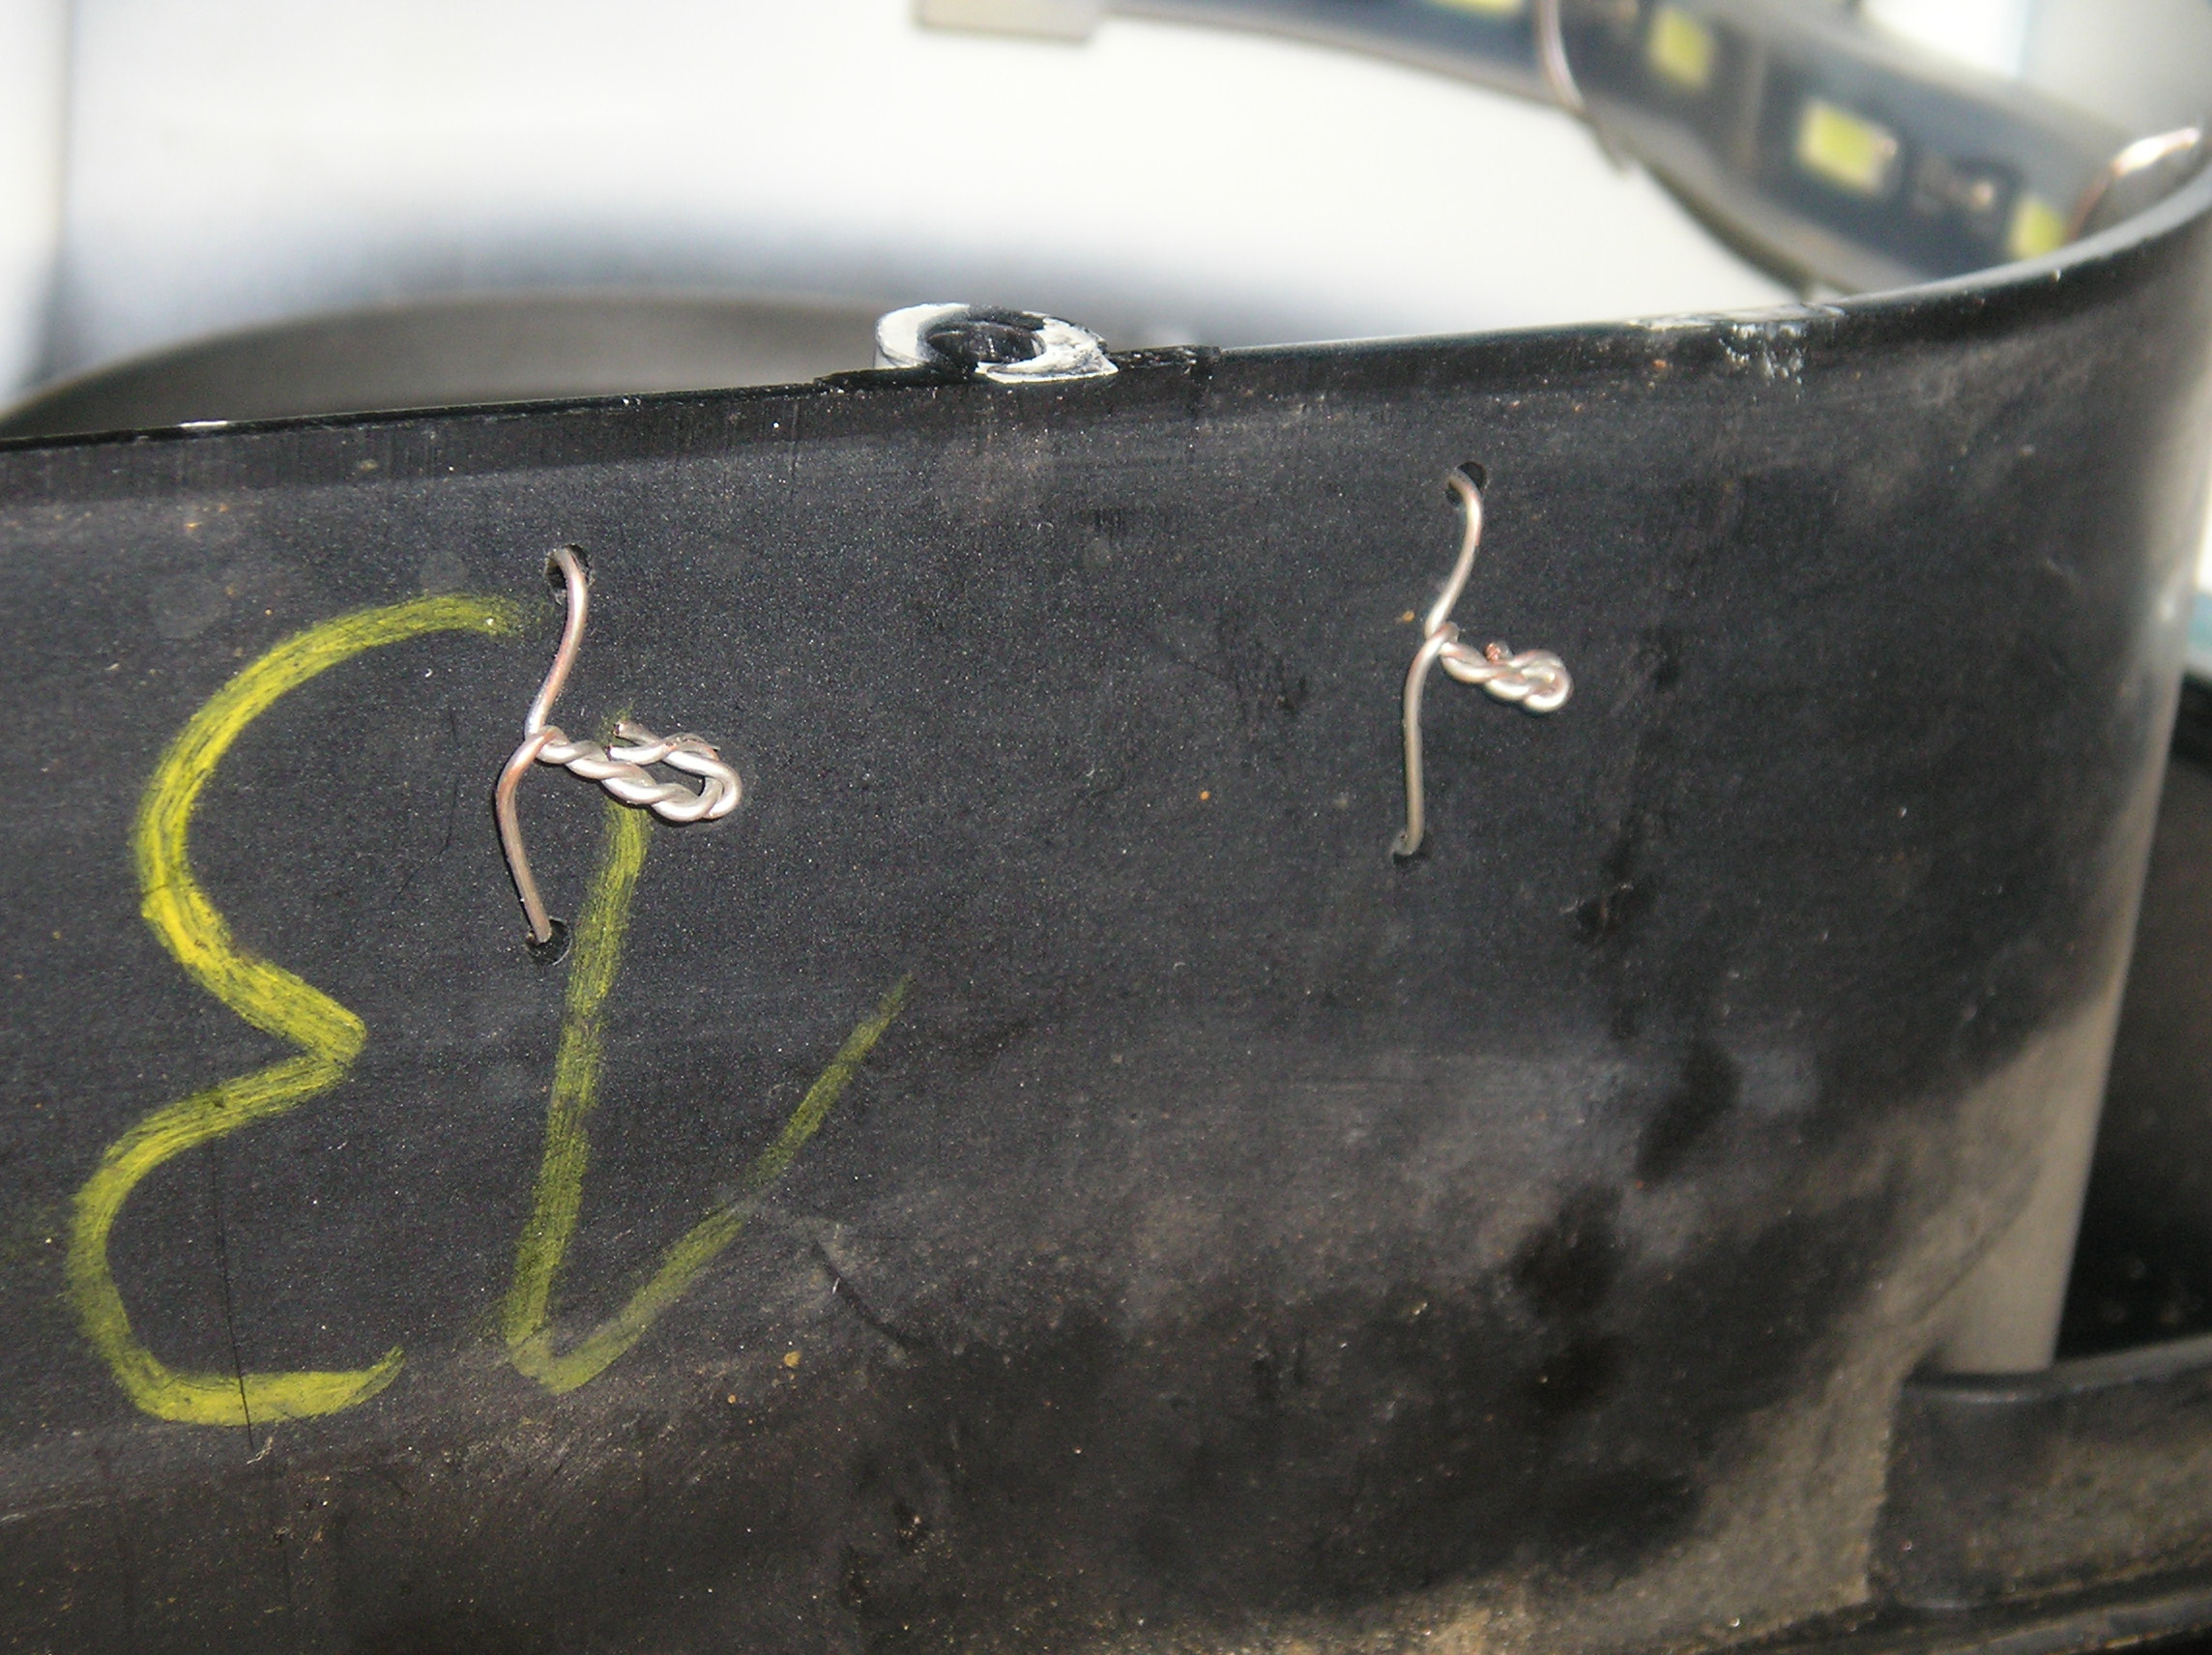
The instrument cluster was removed from the dash, and the gauges were removed from the housing and set aside. Small holes, spaced 0.2" from the housing edge and 0.6" apart, are drilled in the plastic housing at each point that the LED strip is to be secured. 22 AWG tie wire is used to secure the LED strip inside the instrument housing. Note the LED strip is mounted along the top edge of the case, behind the instruments.


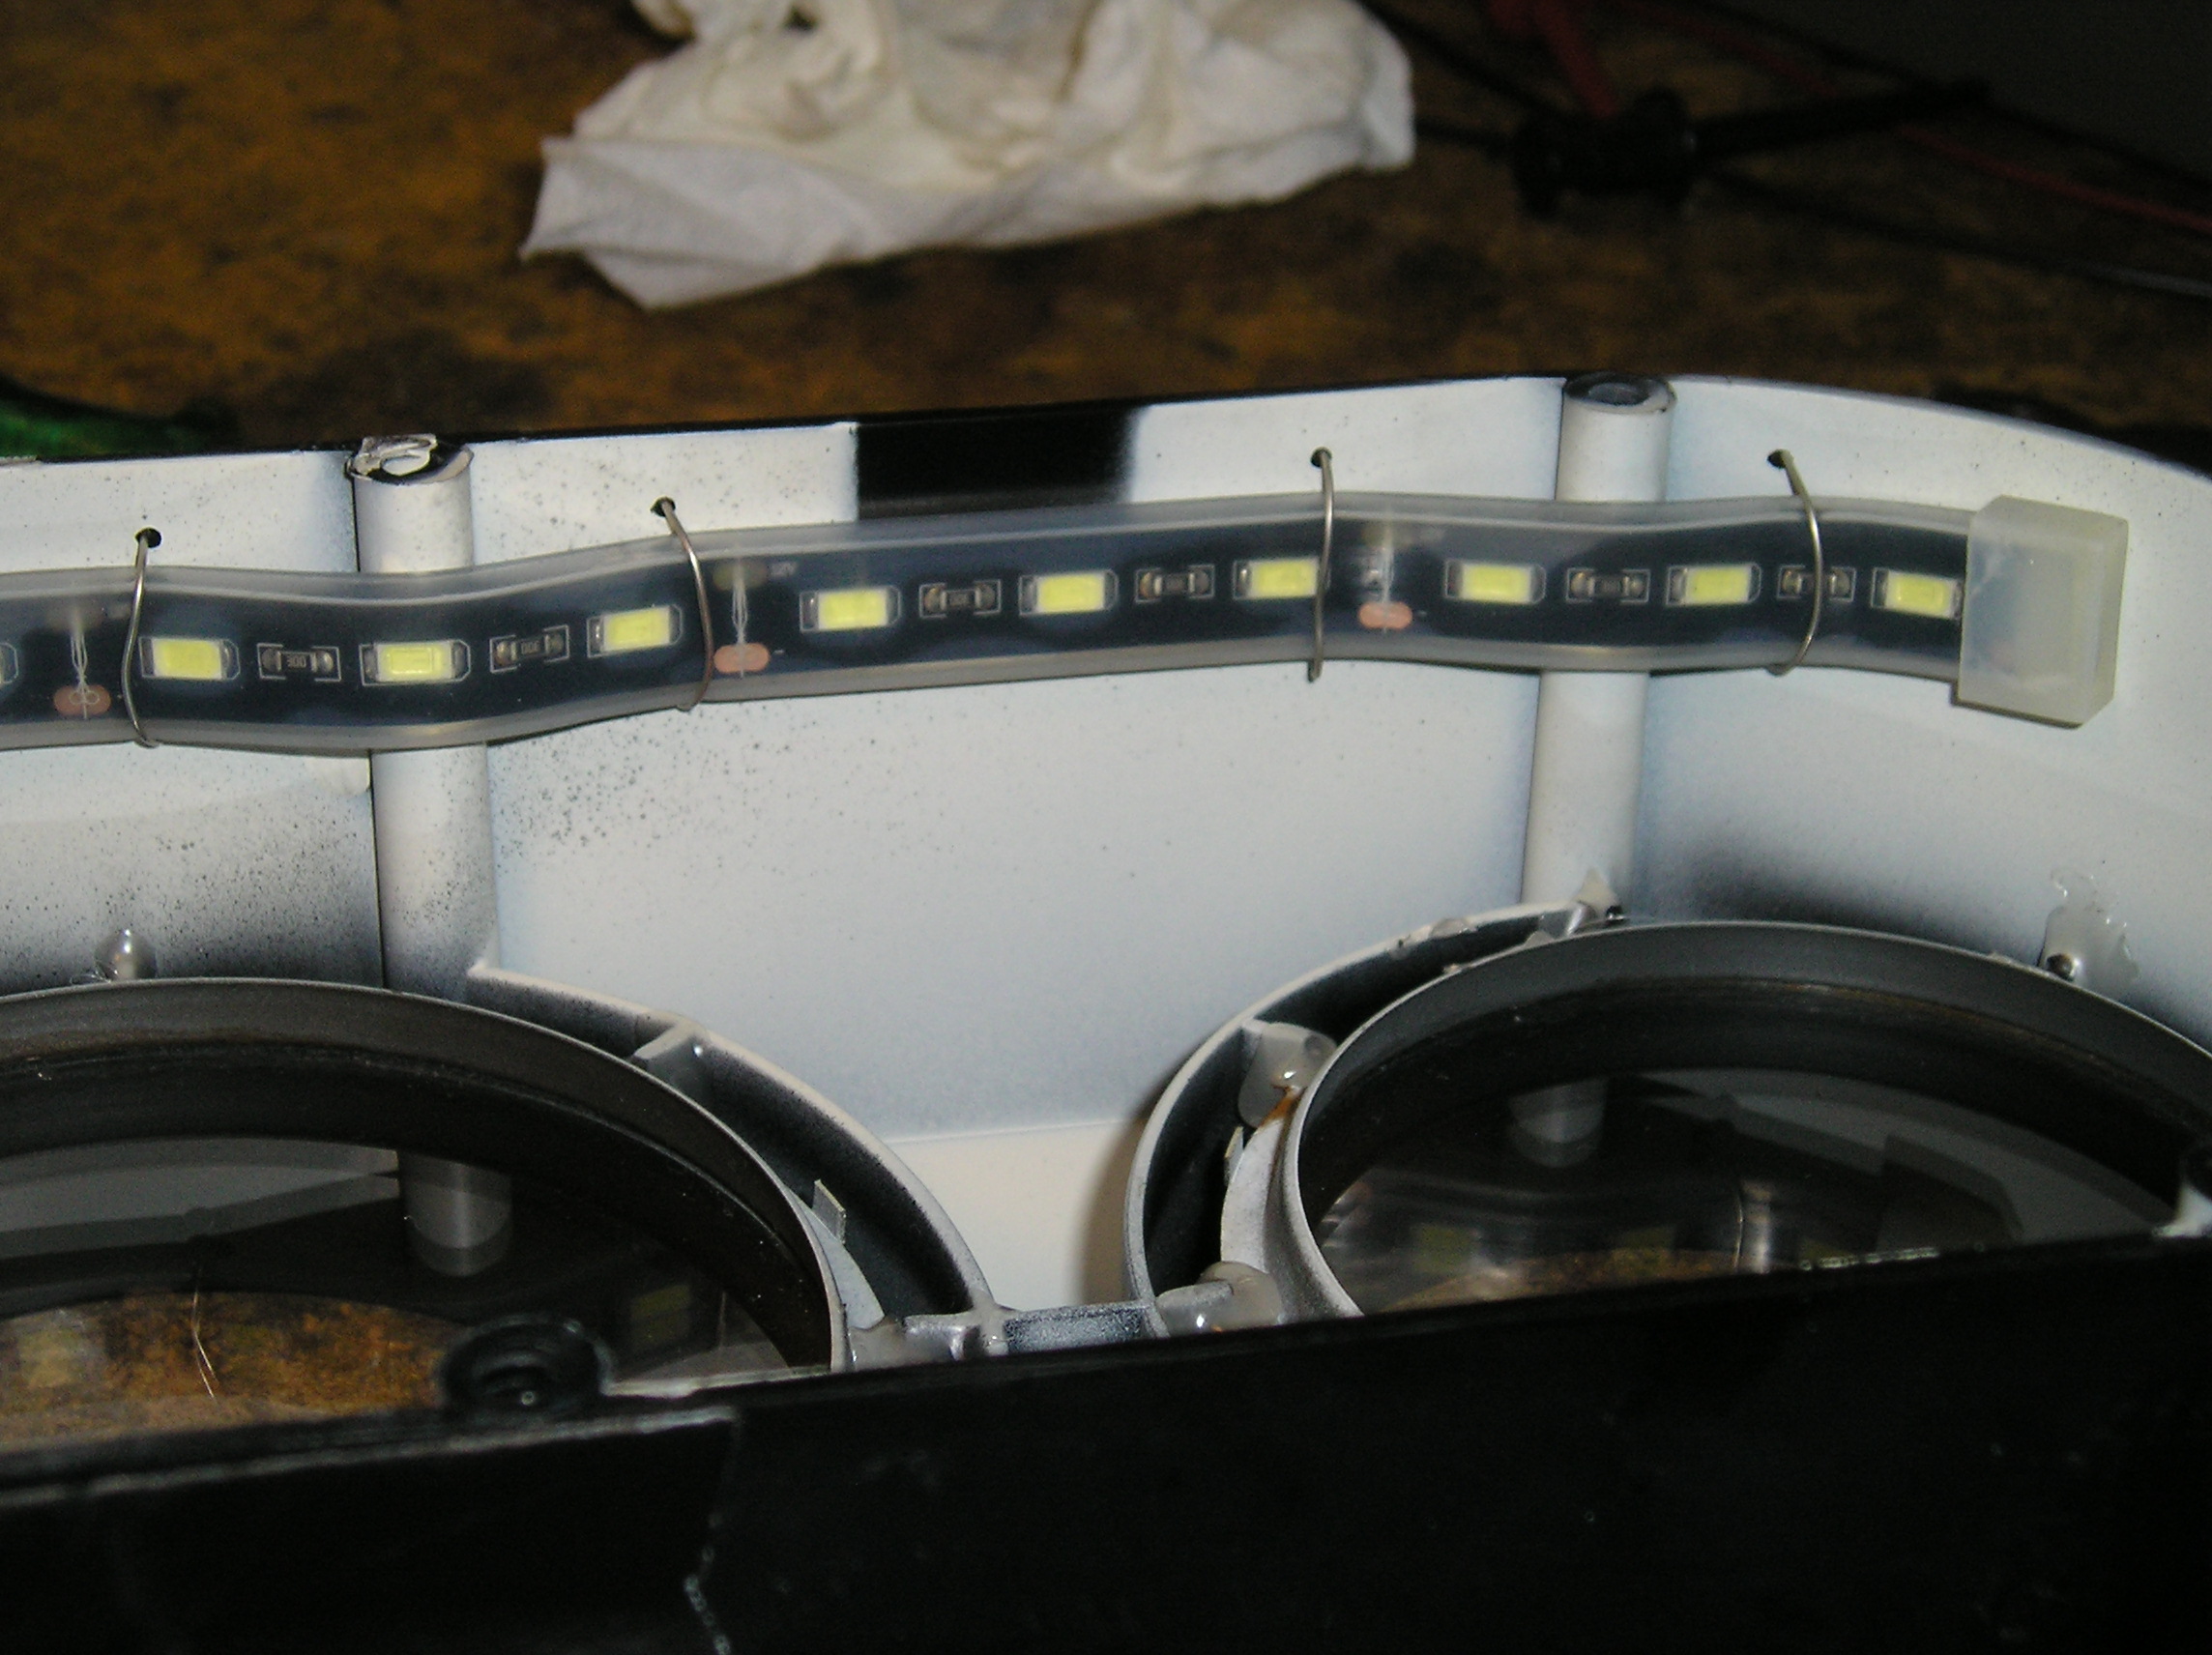
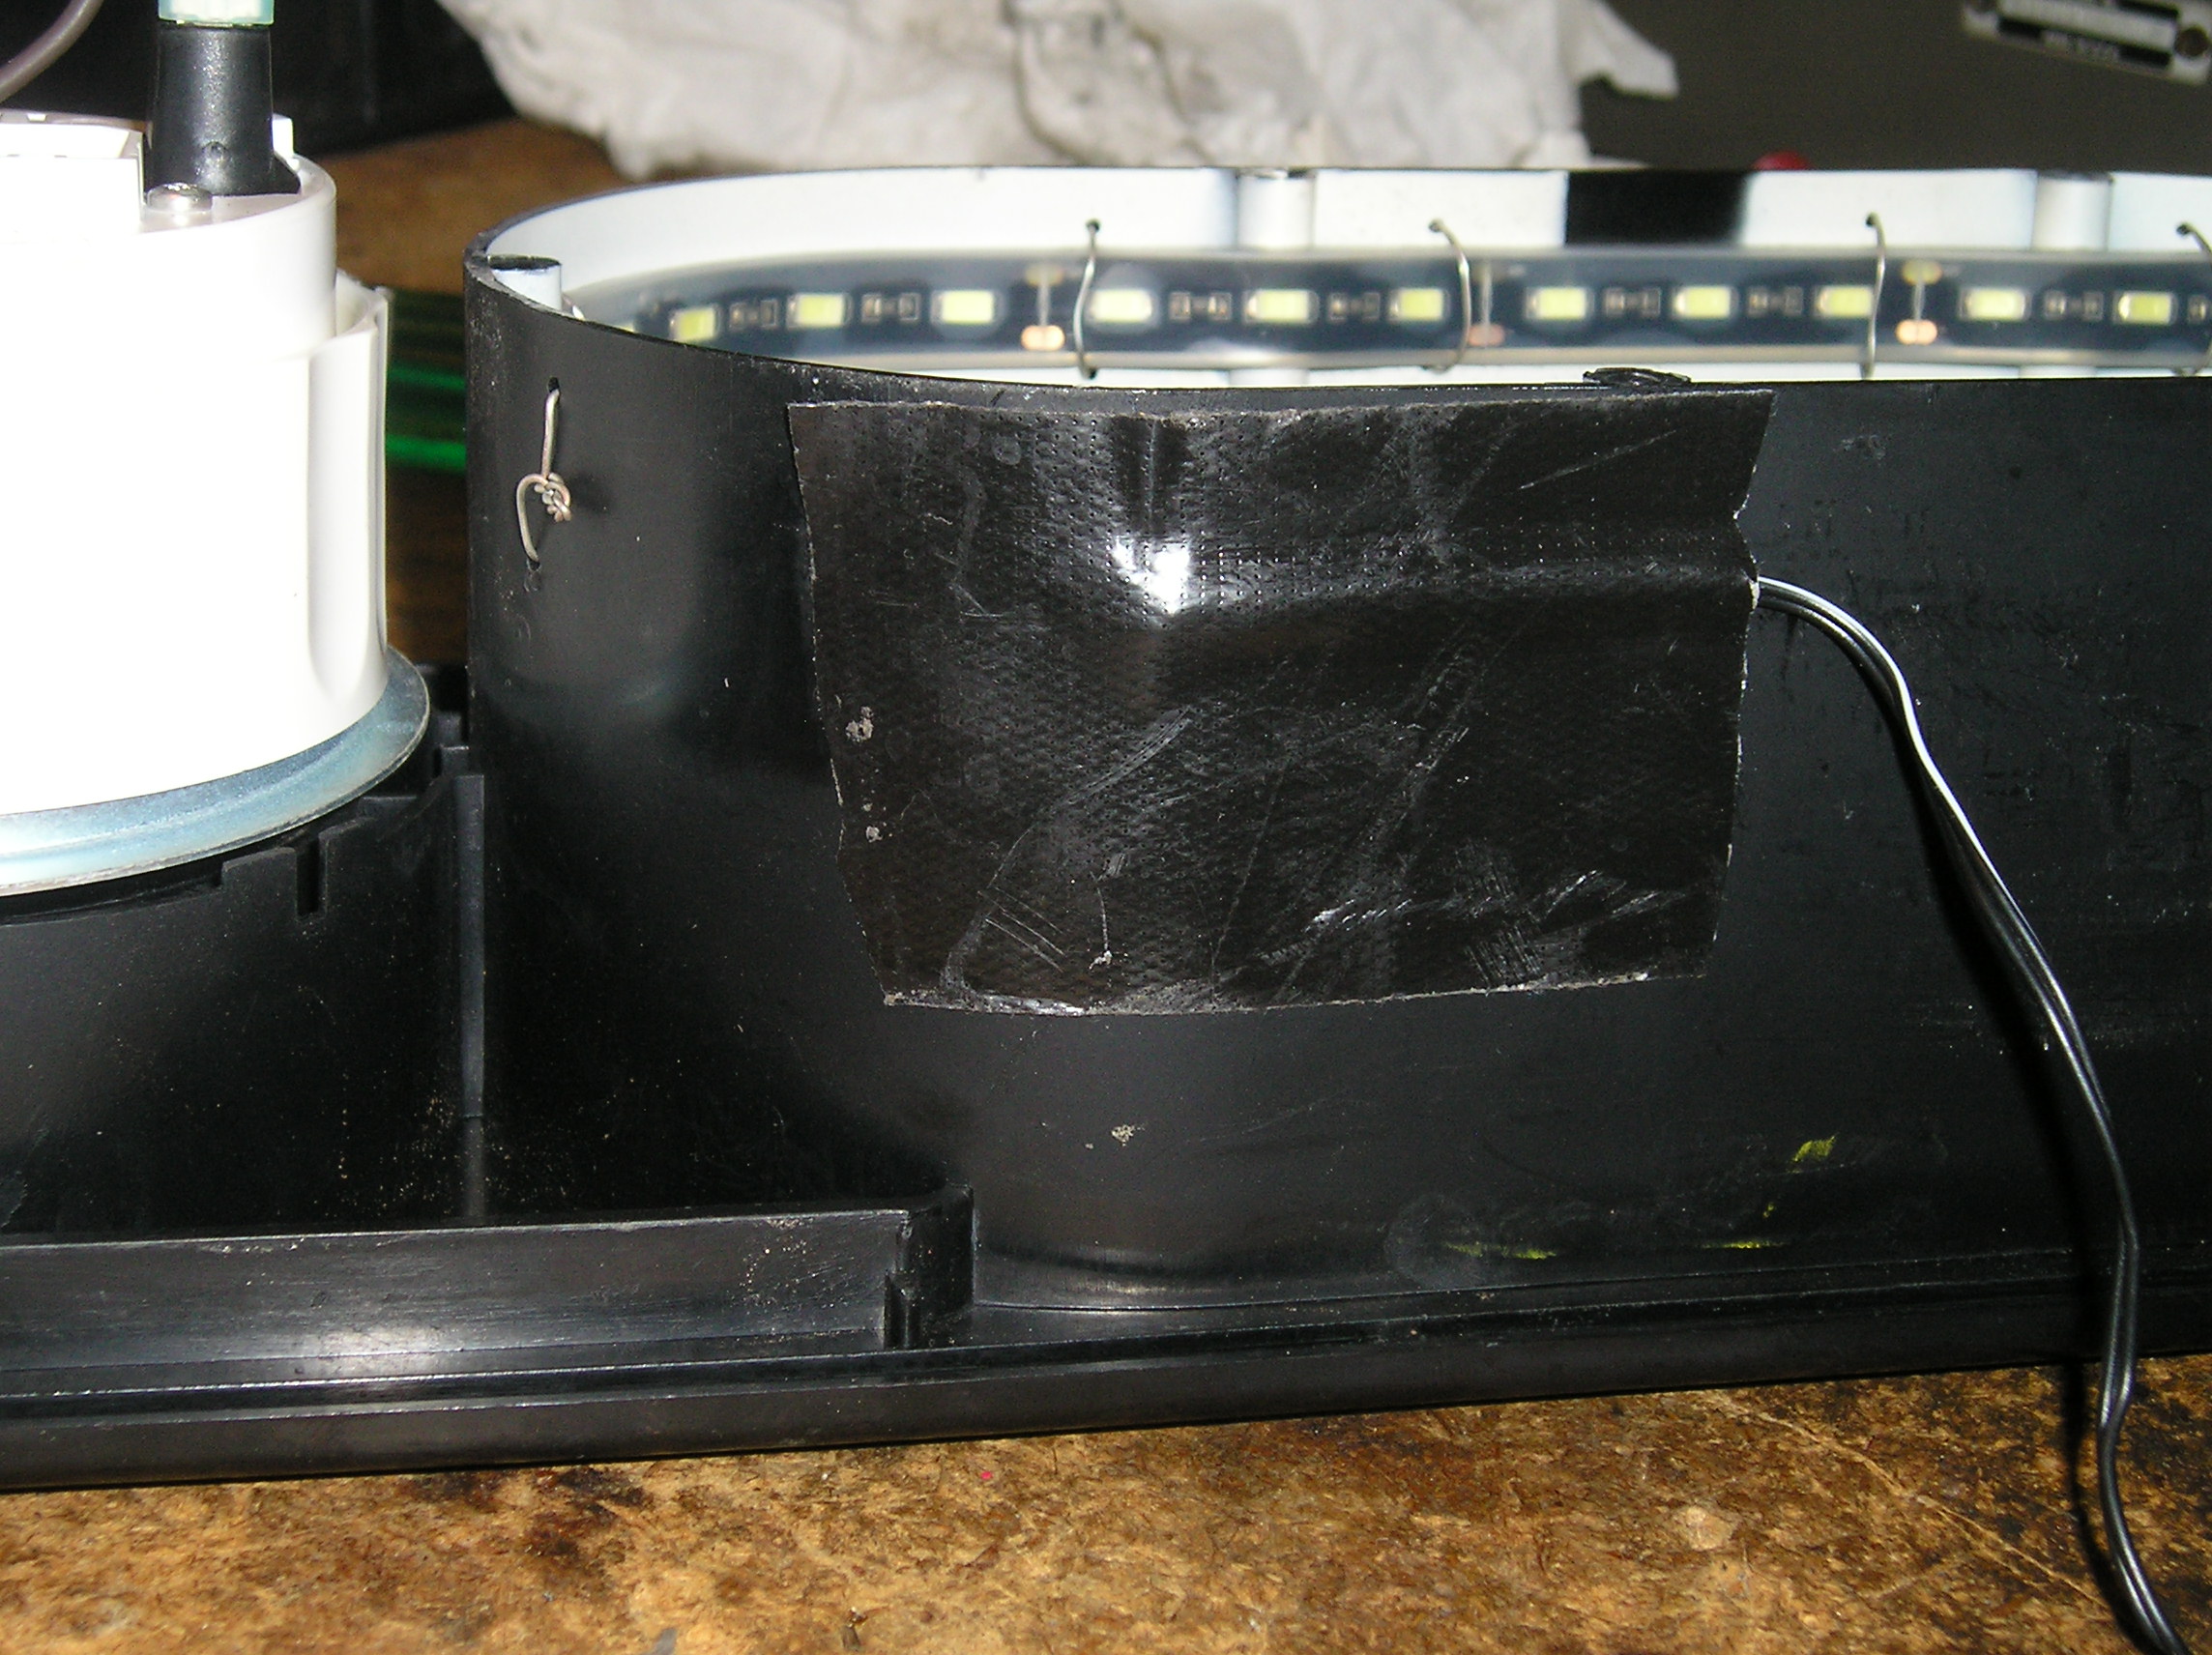
The location where the wires powering the LED strip exit the case is secured with a strip of Gorilla tape.
Here is how the tie wires were secured:
While We're In there...
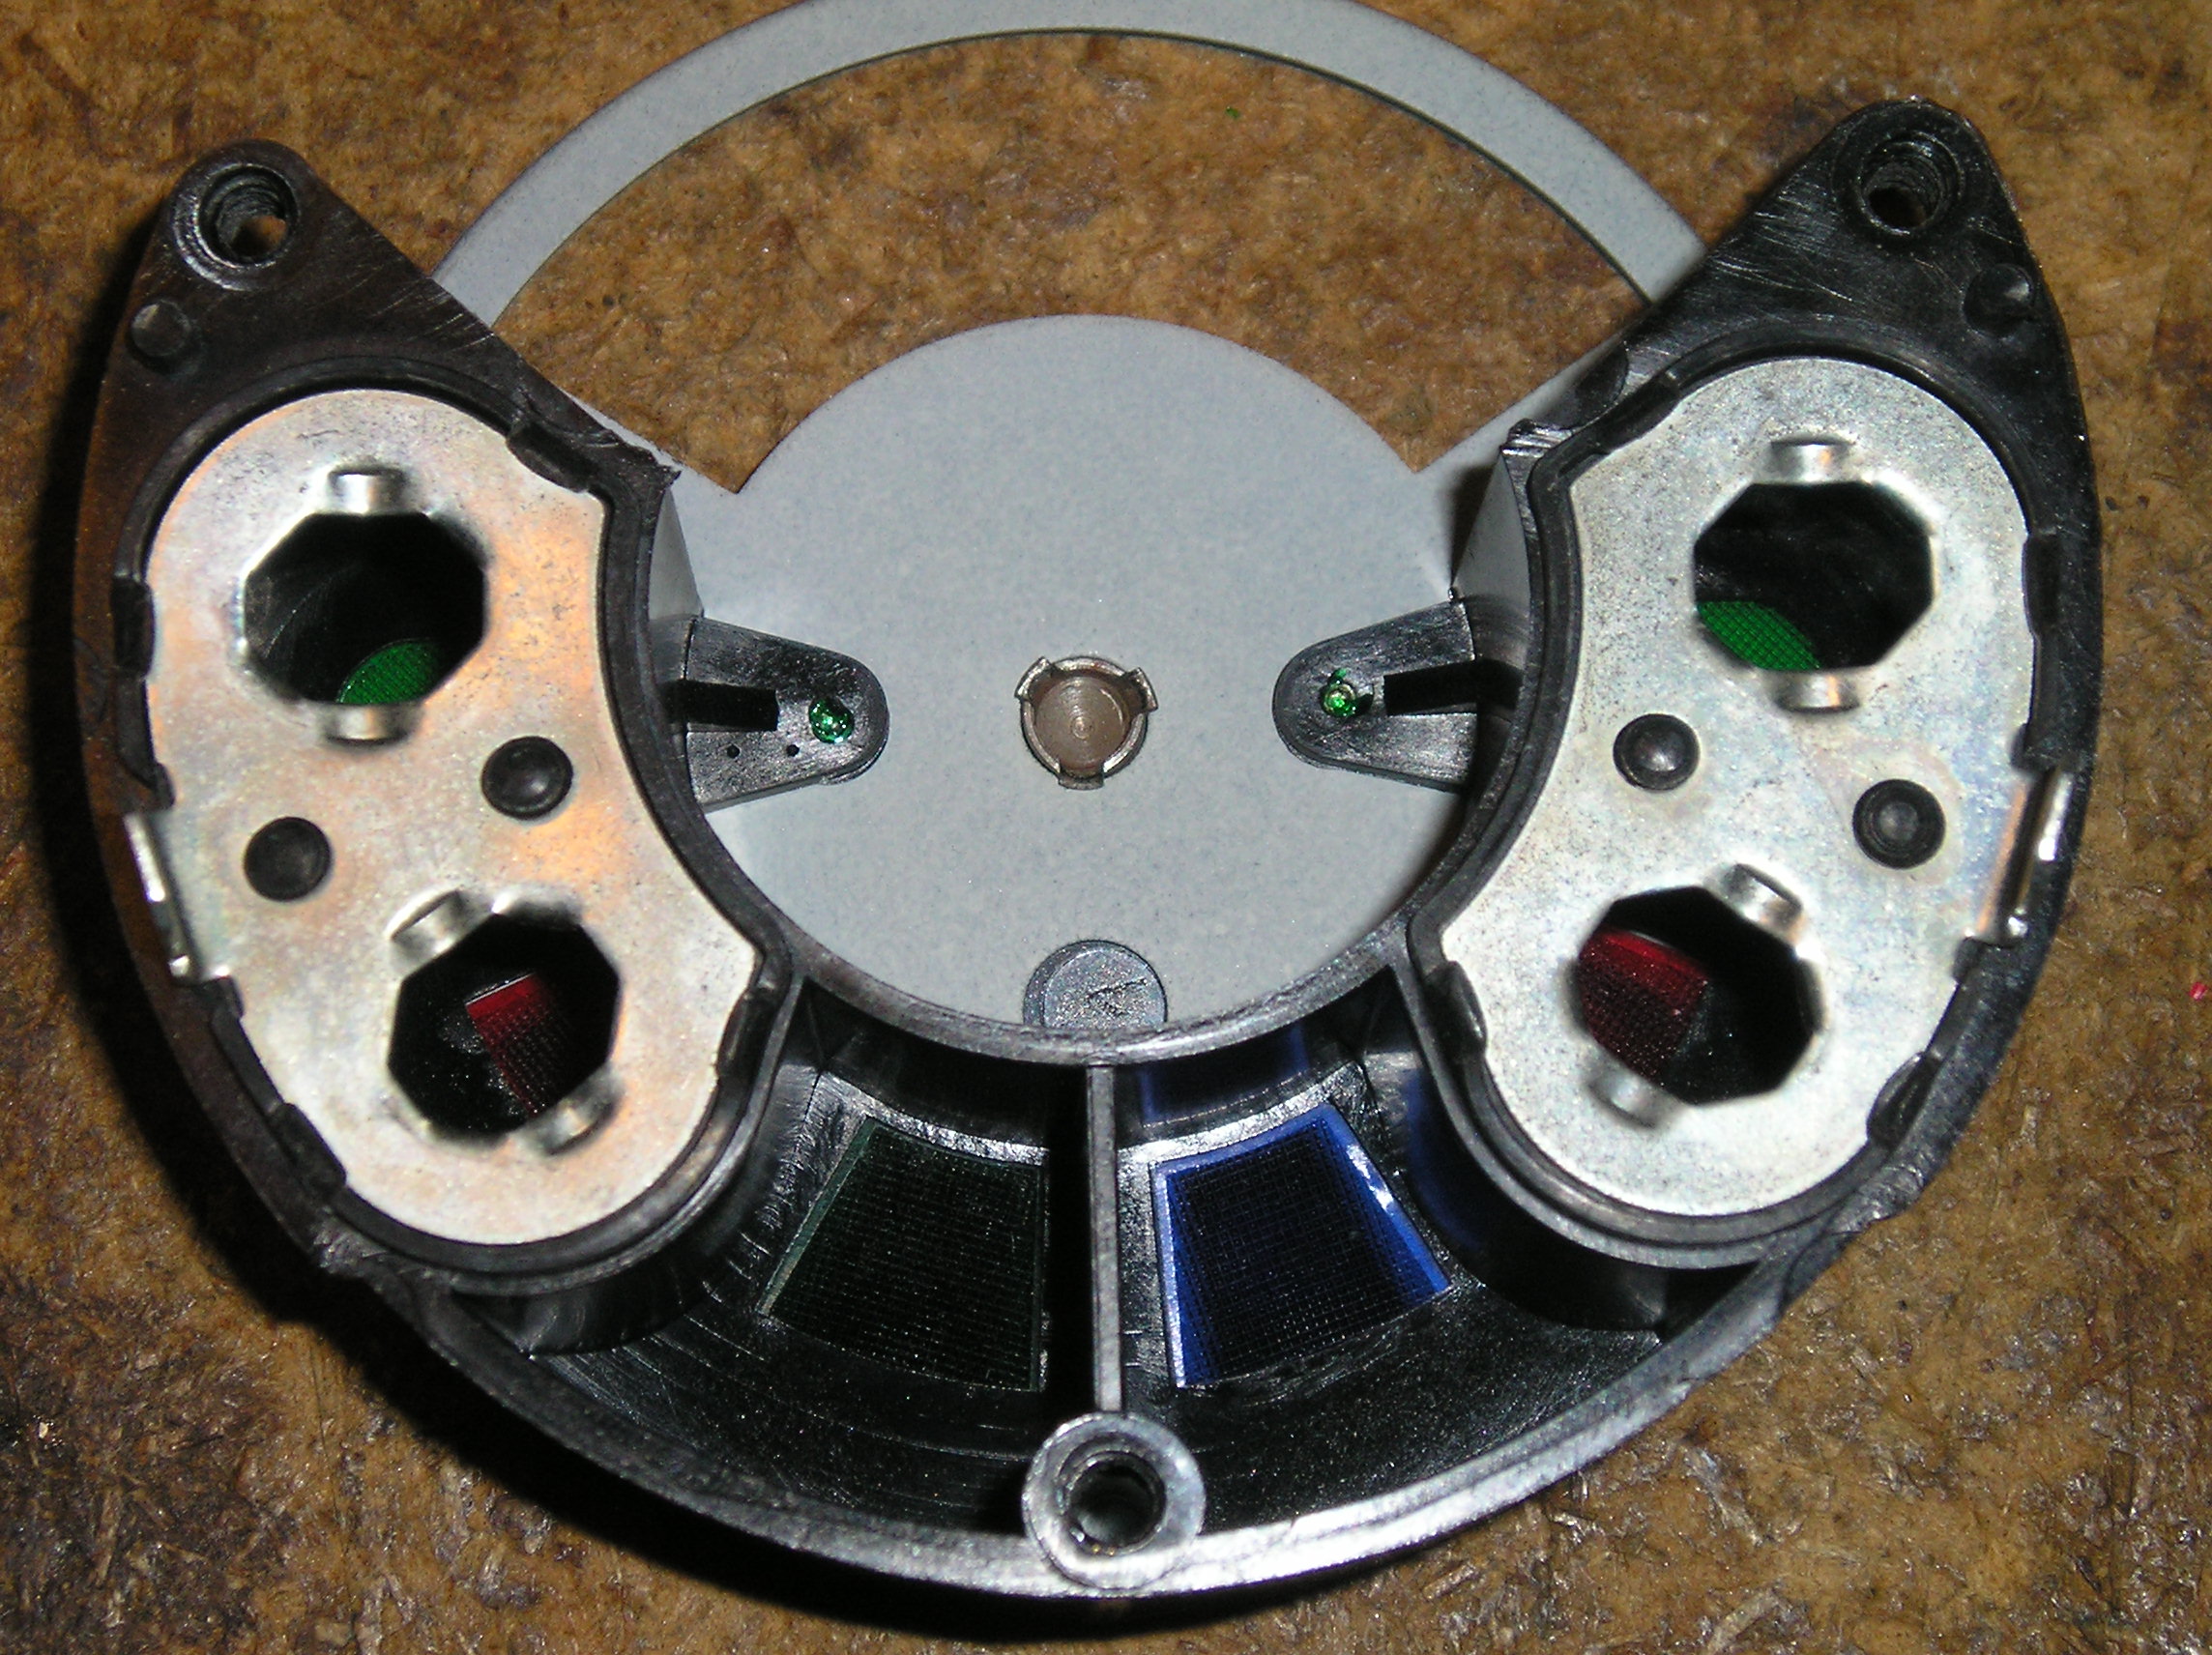
Of course, as long as the cluster is apart, a thorough cleaning is required. The black plastic indicator lamp holder block is removed, disassembled, and cleaned. Note that there is a black plastic mask behind the high beam indicator, which restricts the light illuminating the blue lens. I have always found this annoying, so it was removed.
Do not attempt to remove the cover glass from the cluster case (but do clean it on both sides with glass cleaner)! The plastic mounting points that the retaining rings bite into are brittle with age, and will snap off with little pressure. If too many are damaged, hot glue can be used to secure the retaining rings into the case. Don't use silicone seal for this, as it leaves a real mess.
IMPORTANT: Do not use compressed air on either the fuel gauge or the speedometer, as it will most likely damage them!


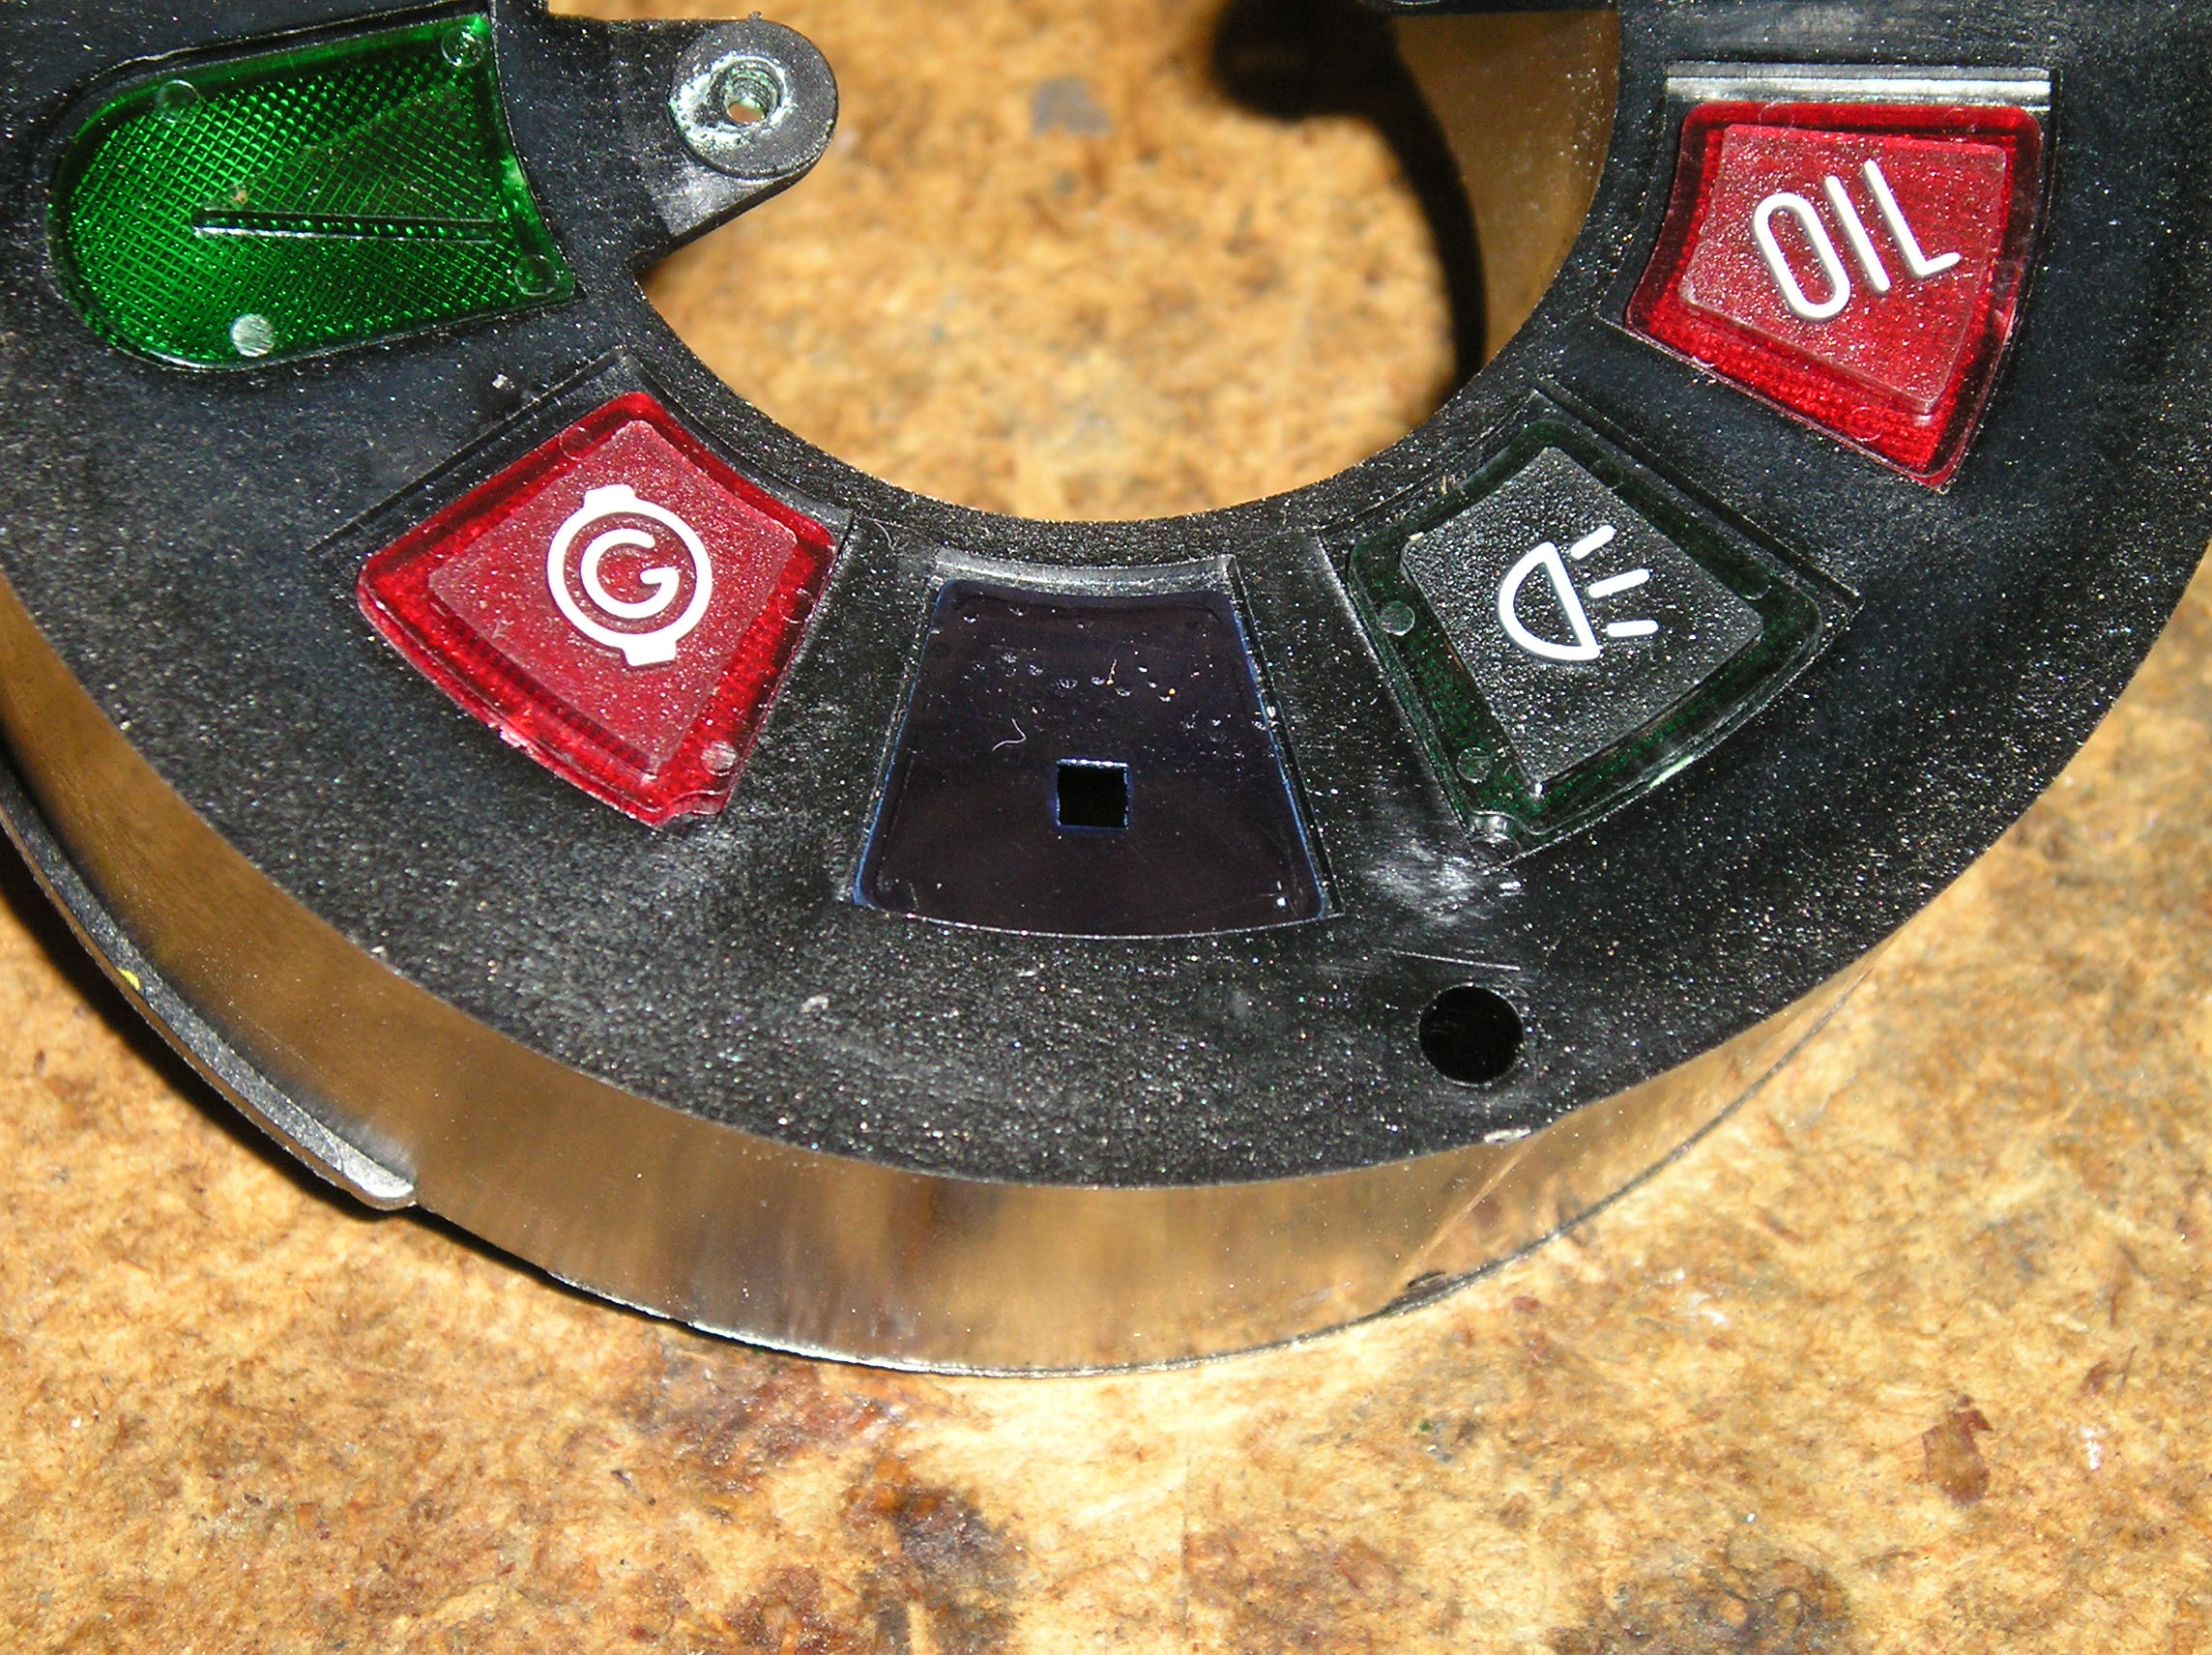
Note that the turn indicators, oil lamp, and generator lamp are mounted on insulated plates, not on the cluster case. This is because these lamps are commoned to +12 volts, not ground. It is worth while buffing up the contact areas for the wire connections and the lampholders with a wire wheel on a Dremel tool. After buffing, coat these areas with a little dielectric grease to keep them from corroding again.
The lamp holder block reinstalled:

After everything is cleaned, the cluster is reassembled. The tachometer power wiring is connected to power and ground on the cluster. The new LED strip wires are connected to the tach lamps using "piggyback" terminals. This allows the use of regular sized wires for connection to the dimmer module. Note that the original two lamps were left in place, to plug the holes. They're just not wired to anything.
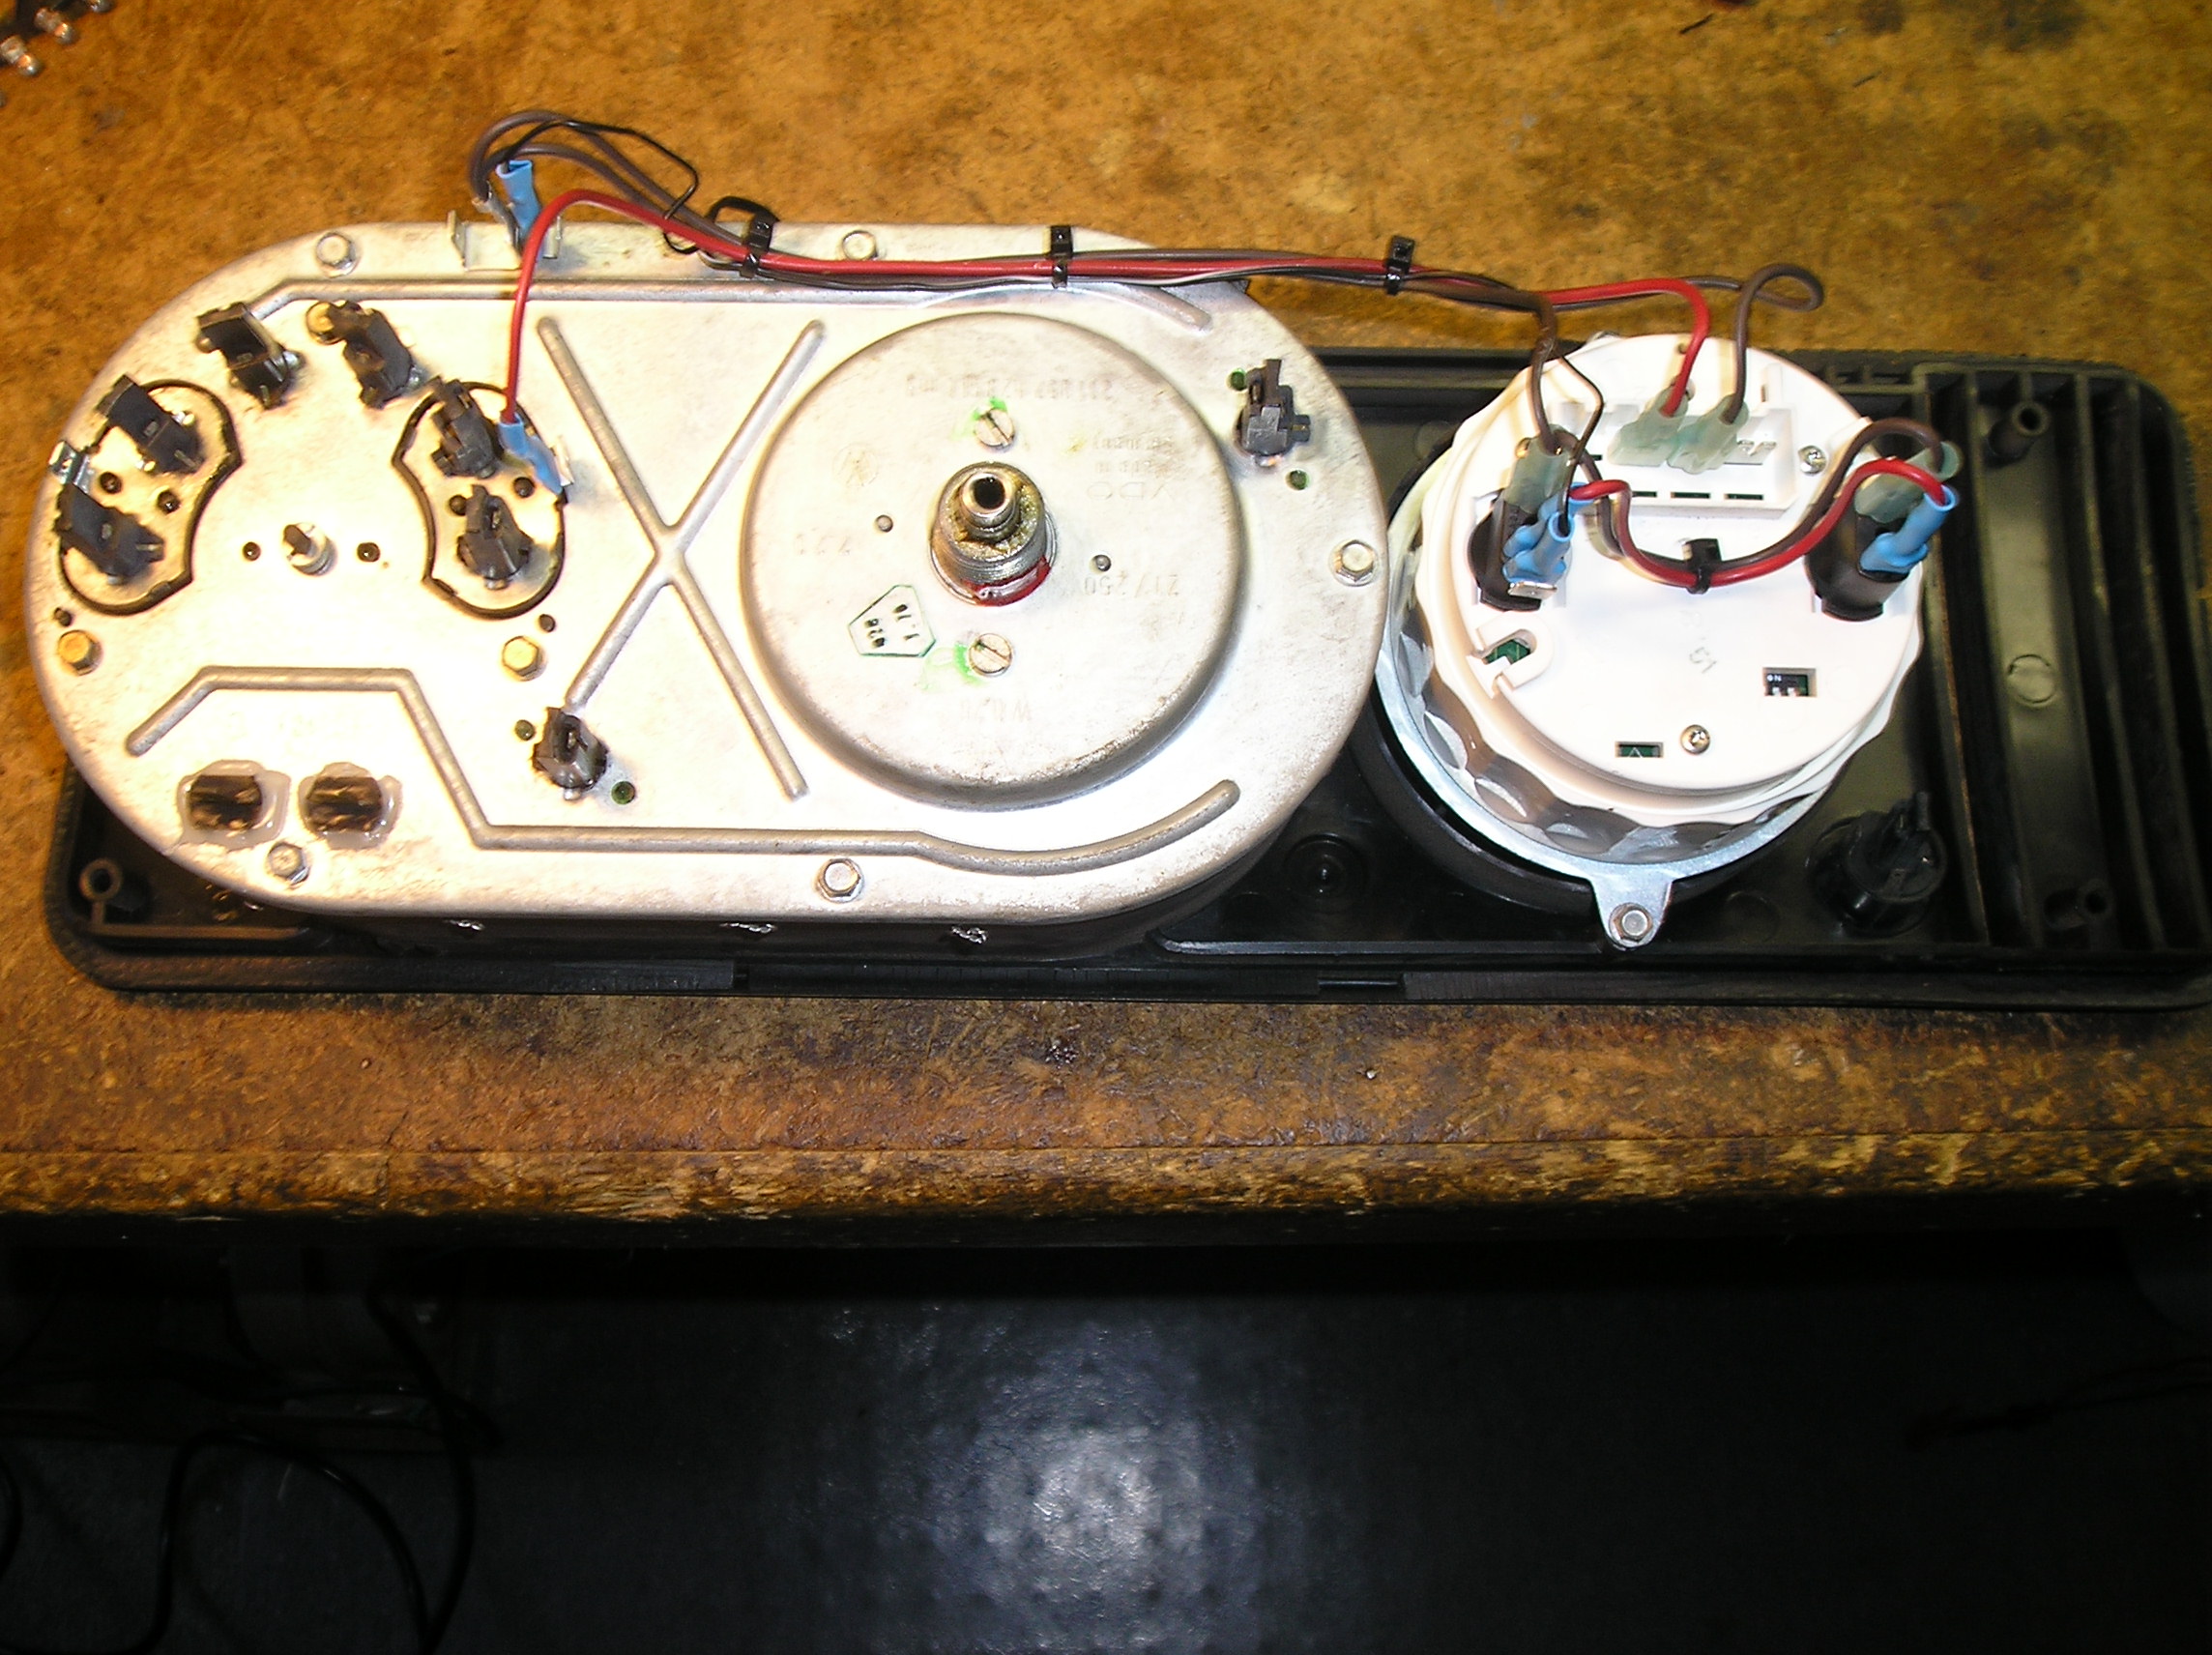
Note that the bulbs in the tachometer will need to be changed to retrofit LED units so that their dimming characteristics match those of the LED strip in the main cluster. The stock incandescent lamps require a bit of power before they even begin to glow, so at low brightness settings, they're still dark while the rest of the instruments are lit.
Here's a sneak-peak at the dimmer module. Work on this is ongoing. Currently, it's installed in the bus for shake-down and life testing.

Update
After much searching, ordering wrong parts, and wasted time, I finally have working LEDs in the tachometer. My initial hopes rested with SuperBrightLeds.com. Unfortunately, even though they have a large offering of LED bulbs in all shapes and sizes, they don't have anything that will fit this VDO tachometer that is dimmable. You can have one or the other, but apparently not both. So, I was forced to buy the official VDO LED bulbs (600-886). These units have four forward facing LEDs each, arranged as two groups of two, paralleled with each other. Below the LEDs is a full-wave bridge rectifier (makes the unit polarity insensitive), and current-limiting resistors. They fit. They dim. They're EXPENSIVE ($16 a piece!) But .... they work. Oh, well...

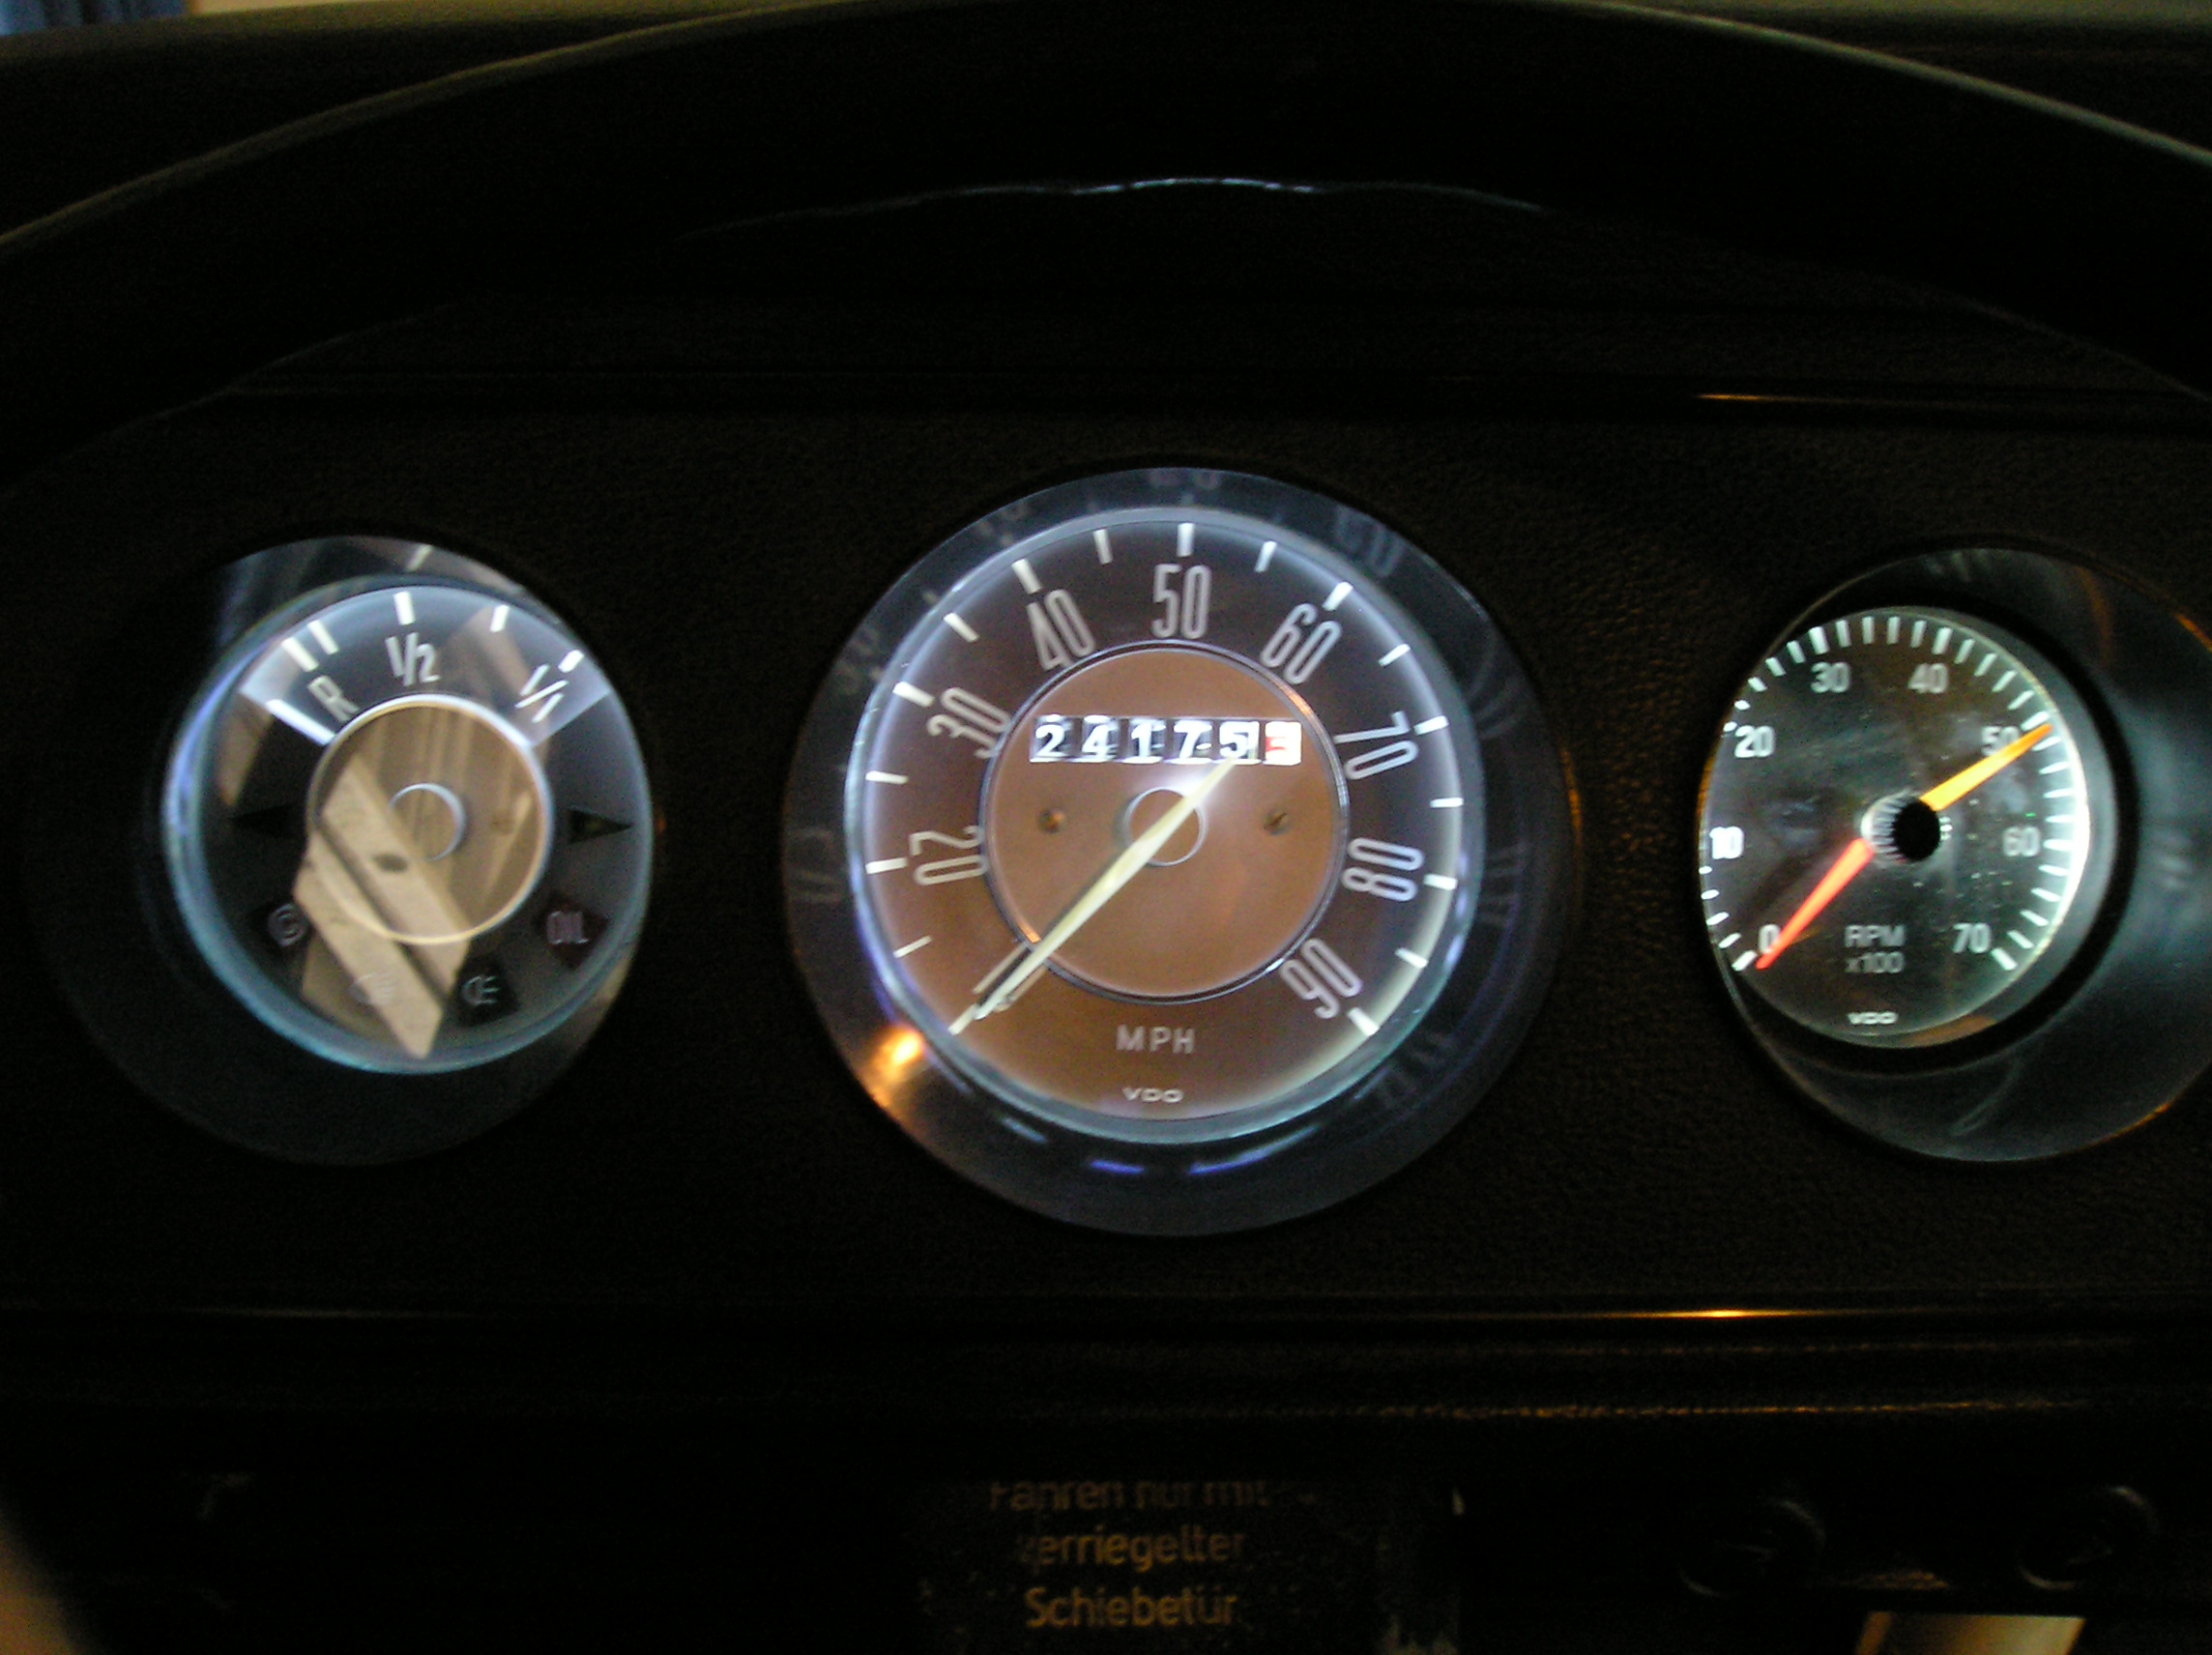
Note: the above pic was taken with the dimmer turned up fairly high, in an attempt to get a hand-held picture that had some semblance of focus. One wouldn't normally drive with the dash lights this bright, but the capability is there, if you need it.